Currently Microsoft provides no way to ingest Syslog messages from network equipment and other devices into OMS Log Analytics in a Windows-only environment. The Linux OMS agent can act as a Syslog collector, but there is no equivalent feature in the Windows agent. I’ve heard rumblings that a windows syslog collector is in the works but in the meantime we need a solution allowing Log Analytics to be our one-stop logging platform.
Enter NXLog Community Edition, an open-source syslog collector and processor. We can use this very light-weight service to act as a syslog collector and then write incoming logs to a file which can be picked up by the OMS monitoring agent.
Setup NXLog
You’ll need a windows server with the OMS monitoring agent installed to act as your syslog collector.
Download and install NXLog CE from here:
https://nxlog.co/products/nxlog-community-edition
Once installed, you can reference this sample config file to setup Syslog ingestion and write-out to log files. With this config, NXLog will create a separate .log file for each logging device, and rotate the files after they reach 10Mb, keeping 5 logs per host.
This file contains hidden or bidirectional Unicode text that may be interpreted or compiled differently than what appears below. To review, open the file in an editor that reveals hidden Unicode characters.
Learn more about bidirectional Unicode characters
| ## This is a sample NXLog configuration file | |
| ## This configuration can be used to collect syslog messages from any RFC 5426 capable device | |
| ## and write those logs to a file which can be picked up by the Log Analytics agent | |
| ## Thanks to jorritfolmer for initial inspiration here: https://gist.github.com/jorritfolmer/bc6374b48bde2ba99f983cc0889da8a9 | |
| ## | |
| define ROOT C:\Program Files (x86)\nxlog | |
| Moduledir %ROOT%\modules | |
| CacheDir %ROOT%\data | |
| Pidfile %ROOT%\data\nxlog.pid | |
| SpoolDir %ROOT%\data | |
| LogFile %ROOT%\data\nxlog.log | |
| <Extension syslog> | |
| Module xm_syslog | |
| </Extension> | |
| <Extension fileop> | |
| Module xm_fileop | |
| </Extension> | |
| ################################################ | |
| ## Inputs | |
| ################################################ | |
| ## Injest syslog over UDP port 514 from any host in IETF format | |
| <Input syslog_in> | |
| Module im_udp | |
| Host 0.0.0.0 | |
| Port 514 | |
| Exec parse_syslog_ietf(); | |
| </Input> | |
| ############################################### | |
| ## Use this processor to filter out syslog based on severity | |
| ## Remember to add the processor to the Route | |
| #<Processor syslog-severity-limit> | |
| # Module pm_filter | |
| # Condition $SeverityLevel > 5 | |
| #</Processor> | |
| ################################################ | |
| ################################################ | |
| ## Outputs | |
| ################################################ | |
| ## Output syslog to file for pickup by OMS agent | |
| <Output syslog_out_file> | |
| Module om_file | |
| File "C:/nxlog/syslog/" + $MessageSourceAddress + ".log" | |
| CreateDir TRUE | |
| Exec if (syslog_out_file->file_size() > 10M ) file_cycle("C:/nxlog/syslog/" + $MessageSourceAddress + ".log",5); | |
| Exec syslog_out_file->reopen(); | |
| </Output> | |
| <Route to_LogAnalytics> | |
| Path syslog_in => syslog_out_file | |
| </Route> |
Once your configuration file is set, restart the NXLog service. If successful you should now be able to point a syslog device to your NXLog server and see log files being written out right away.
Add a Custom Log type to Log Analytics
Now that incoming syslog is being written to a file, we can use the OMS monitoring agent already installed to collect the files and ingest them into Log Analytics. To do this, create a new Custom Log type in Log Analytics.
Open the OMS Log Analytics portal and go to:
Settings > Data > Custom Logs

Click Add + to create a new custom log type.
Upload one of the log files you are now generating as a sample to help Log Analytics learn to properly parse the files.

Make sure the records are delimited properly by Log Analytics, the New Line method should work well here.

Configure the directory the Monitoring Agent should scan for log files. Keep in mind, this directory will be processed for all windows servers.

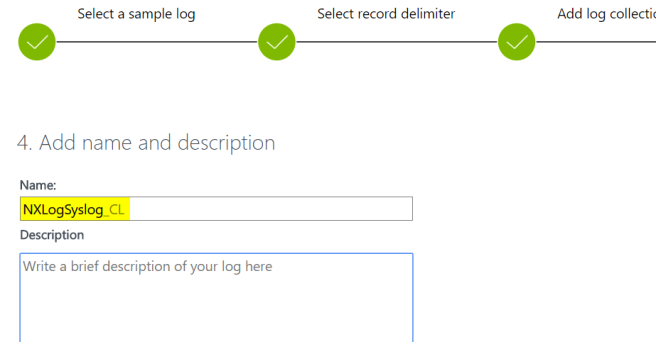
Name your new custom log type:
After a short while, the OMS agent will begin picking up the log files and you can find your fresh syslogs in Log Analytics. From here you could create custom fields to pull out specific values, create alerts, or just leave as is.